Technical Analysis of Full-Scene 3D Projector Solutions
I. Core Technology Routes and Differences of 3D Projectors
Currently, 3D projectors primarily rely on two major technology routes: DLP
(Digital Light Processing) and LCD (Liquid Crystal Display). These two
technologies differ significantly in their 3D imaging principles, image quality,
and applicable scenarios, requiring a suitable solution based on actual
needs:
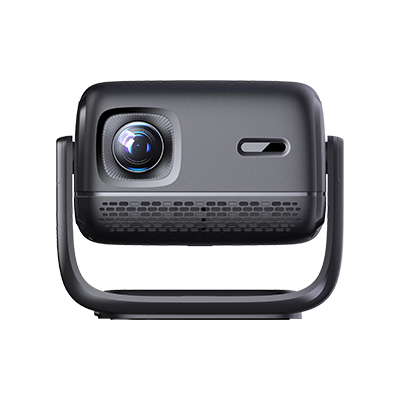
(I) DLP 3D Technology Solution
DLP technology achieves 3D imaging through high-speed switching of DMD
chips (Digital Micromirror Devices). Its core principle is to utilize
"time-division multiplexing" technology to alternately project parallax images
for the left and right eyes onto the screen. Combined with synchronized shutter
3D glasses, each eye receives its corresponding image, creating stereoscopic
vision. In terms of technical specifications, DLP 3D projectors must have a
refresh rate of 120Hz or higher (each eye receives a 60Hz image), with some
high-end models supporting 240Hz to reduce flicker. Brightness generally ranges
from 2500 to 5000 lumens, with high-brightness versions suitable for brightly
lit environments (such as commercial exhibition spaces). Contrast ratios
typically range from 10,000:1 to 100,000:1, offering superior dark field
performance and making it suitable for 3D movies and sci-fi content, clearly
rendering dark details (such as those in space and night scenes).
The advantages of this technology are that it produces 3D images without
color separation, with high color reproduction, and supports a "2D to 3D"
function, converting regular 2D content into 3D in real time. However,
limitations include the need for shutter-type 3D glasses to be synchronized with
the projector (via infrared or Bluetooth signals), and the weight of the glasses
(approximately 30-50g), which can cause slight fatigue after prolonged wear.
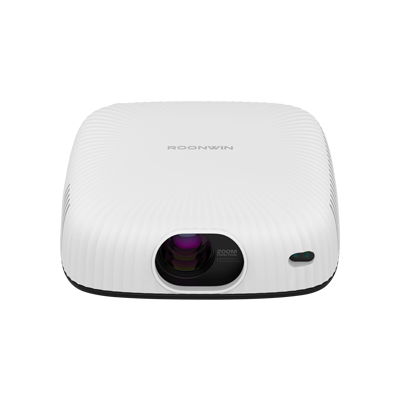
(II) LCD 3D Technology Solution
LCD technology achieves 3D imaging through "polarized light splitting." The
projector has built-in polarizers, which project the parallax images for the
left and right eyes as horizontally and vertically polarized light,
respectively. The viewer wears polarized 3D glasses (the lenses filter the
corresponding polarized light), allowing each eye to receive different
images.
In terms of technical specifications, LCD 3D projectors typically have a
brightness of 2,000-4,000 lumens, with some models designed for educational use
capable of exceeding 5,000 lumens. Contrast ratios range from 5,000:1 to
30,000:1, resulting in high color saturation and suitable for displaying
colorful 3D content (such as animations and product models). Refresh rates are
typically 60Hz, with some models supporting 120Hz. While image smoothness is
slightly inferior to high-end DLP models, polarized glasses are lightweight
(approximately 10-20g), comfortable to wear, and require no power supply (no
battery replacement required). Its advantages are low cost, adaptability
(different brands of polarized glasses can be used interchangeably), and
suitability for simultaneous use by multiple people (such as in classrooms and
conference rooms). Its limitations are that the 3D image resolution is reduced
due to split-screen technology (the resolution received by each eye is 1/2 of
the original resolution), and it requires a dedicated polarized screen (ordinary
white screens will cause polarization disturbances, affecting the 3D effect).
II. Core Configuration Requirements for a 3D Projection System
A complete 3D projection system includes a projector, a 3D signal source, a
transmission link, and supporting equipment. Each component must meet the
requirements for 3D signal transmission and imaging. Specific configuration
requirements are as follows:
(I) 3D Signal Source Compatibility
The 3D signal source must support mainstream 3D formats, including frame
packing (a common format used in Blu-ray 3D discs, with resolutions up to
1080p/24Hz), field sequential (suitable for 120Hz refresh rate projectors, with
a single field resolution of 1080p), side-by-side (common in online 3D videos,
where the left and right eye images are arranged horizontally and the resolution
is compressed to half of the original), and top-and-bottom (where the left and
right eye images are arranged vertically and the resolution is compressed to
half of the original). Signal source devices include 3D Blu-ray players,
computers that support 3D output (must be equipped with a dedicated graphics
card, such as one that supports HDMI 1.4 or later, with 3D mode enabled in the
driver), and 3D set-top boxes. Ensure that the 3D format output by the device is
compatible with the projector to avoid signal recognition issues or image
distortion.
(II) Transmission Link Configuration
The transmission cable must support the 3D signal bandwidth requirements.
HDMI 1.4 or later is the mainstream choice (HDMI 1.4 supports 1080p/60Hz 3D
signals, while HDMI 2.0 and later supports 4K/60Hz 3D signals). Cable lengths
exceeding 15 meters are recommended. (If the cable length exceeds 15 meters, an
HDMI signal amplifier is required to prevent signal attenuation and 3D image
freezes and ghosting.) For wireless transmission, choose a wireless HDMI device
that supports 3D signals. The transmission rate must be above 10Gbps, and the
latency must be kept within 50ms to avoid image and audio asynchrony (especially
when playing 3D movies or games). Also, ensure that the transmission environment
is free of strong electromagnetic interference (for example, away from devices
such as microwave ovens and wireless routers). (III) Supporting Equipment
Requirements
3D glasses: They must match the projector's technology (DLP projectors
require shutter glasses, LCD projectors require polarized glasses). Shutter
glasses must be synchronized with the projector (infrared synchronization
requires ensuring the glasses are within the projector's infrared signal range;
Bluetooth synchronization requires pre-pairing). Polarized glasses must have
their polarization direction confirmed (horizontal/vertical polarization must
align with the projector's polarizer).
Projection Screen: DLP 3D systems can be used with either a regular white
or gray screen (gray screens improve contrast). LCD 3D systems require a
polarized screen (metal polarized screens or white plastic polarized screens.
Metal polarized screens offer higher gain and are suitable for large spaces,
while white plastic polarized screens offer better color reproduction). The
screen size must match the projector's throw ratio (e.g., for a projector with a
throw ratio of 1.2-1.5, a 100-inch screen should be installed 2.5-3.5 meters
away).
Audio Equipment: 3D content often includes multi-channel audio (e.g., 5.1,
7.1, etc.). Channels), an amplifier and speaker system are required. HDMI ARC
(audio return channel) or optical fiber is recommended for audio interfaces to
ensure synchronized audio and 3D image output.
III. 3D Projection Solution Compatibility for All Scenarios
Different scenarios require different brightness, resolution, stability,
and usability for 3D projection. Targeted solutions are needed, covering four
core scenarios: home, commercial, education, and engineering.
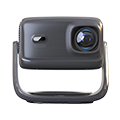
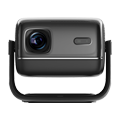
(I) Home 3D Projection Solution
The core requirements are immersion, image quality, and ease of use. DLP 3D
projectors (no color separation and excellent dark field performance) are
preferred for technology selection. Recommended parameters: brightness of
2500-3500 lumens (suitable for nighttime viewing and low-light daytime
environments), resolution of 1080p or higher (4K models can enhance detail and
are suitable for large screens), and contrast ratio of 15,000:1-50,000:1 (to
enhance dark details in movies). Regarding system configuration, consider a 3D
Blu-ray player (for playing genuine 3D discs) or a computer with 3D output (for
installing 3D games and playing local 3D videos). Use an HDMI 2.0 cable
(supporting 4K 3D signals). Choose a 100-120-inch gray screen (to improve
contrast and reduce ambient light interference). Use two to four pairs of
shutter-type 3D glasses (to accommodate the number of people in your
family).
Optimization Tips: During installation, ensure the center of the projector
lens is aligned with the center of the screen (to avoid image offset and
misalignment of the 3D effect). Adjust the 3D depth of field (based on viewing
distance; typically, set it to medium at 2-3 meters to avoid dizziness). Enable
the projector's "3D noise reduction" function (to reduce graininess). (II)
Commercial 3D Projection Solutions (e.g., Product Displays, Exhibition
Halls)
Core requirements include high brightness, stability, and adaptability for
multiple viewers. Technology selection can be tailored to the scenario: DLP 3D
projectors (brightness 3500-4500 lumens, contrast ratio 20,000:1) are
recommended for small exhibition halls (20-50 m2). LCD 3D projectors (brightness
4500-5000 lumens, paired with a metal polarizing screen for improved brightness
uniformity) are recommended for large exhibition halls (50-100 m2).
In terms of system configuration, a looping 3D player (storing product 3D
model demonstration videos) is used as the signal source. An HDMI signal
splitter is used for transmission (supporting simultaneous output from multiple
projectors, suitable for spliced projection scenarios). 10-20 pairs of
polarized 3D glasses are provided (low-cost, no battery life concerns). A
120-150-inch metal polarizing screen (gain ≥ 2.0, covering a wider viewing area)
is used as the screen. Key optimization points: Enable the projector's "keystone
correction" function (to accommodate irregular installation environments in
exhibition halls, such as angled projection), set "3D image synchronization" (to
ensure left-eye and right-eye image synchronization when splicing multiple
projectors to avoid ghosting at the joints), and regularly clean the projector
lens and polarizer (to prevent dust from affecting image quality).
(III) Educational 3D Projection Solutions (e.g., classrooms,
laboratories)
Core requirements are high brightness, ease of use, and low maintenance.
Prioritize LCD 3D projectors (brightness of 4,000-5,000 lumens to accommodate
bright classroom lighting; polarized glasses are low-cost and suitable for group
use by students), 1080p resolution (to meet the clarity requirements of teaching
materials), and a contrast ratio of 10,000:1-20,000:1 (to clearly display 3D
teaching models, such as the human body and mechanical principles). Regarding
system configuration, the signal source is the teacher's computer (installed
with 3D teaching software, such as 3D anatomy software and mechanical
disassembly software). Wireless HDMI is used for transmission (to avoid
cluttered classroom wiring and facilitate mobile operation for the teacher).
30-50 pairs of polarized 3D glasses are provided (based on class size and are
reusable). A 100-120-inch white plastic polarized screen is used (excellent
color reproduction, suitable for showcasing color details in teaching
content).
Optimization points: Enable the projector's "Eco Mode" (to reduce power
consumption and extend lamp life; a lamp life of ≥ 6,000 hours is recommended).
Set "3D Image Zoom" (to adjust the image size based on the teaching content,
such as magnifying details of mechanical parts). A remote control lock function
is also included (to prevent students from operating the device accidentally).
(IV) Engineering 3D Projection Solutions (e.g., large venues, virtual
simulations)
Core requirements are ultra-high brightness, high resolution, and splicing
compatibility. DLP 3D projectors are primarily used for this technology
(supporting multiple splicing and excellent image synchronization). Recommended
parameters include: brightness of 5,000-10,000 lumens (paired with a high-gain
screen to accommodate the bright lighting conditions of large venues), 4K
resolution (for displaying detailed 3D models, such as architectural designs and
industrial simulations), and a contrast ratio of 50,000:1-100,000:1 (to enhance
the depth of the image). In terms of system configuration, the signal source
uses a high-performance server (running 3D virtual simulation software and
supporting multi-channel output). HDMI 2.1 cables or fiber optic transmission
are used (supporting long-distance transmission of 4K/60Hz 3D signals without
attenuation). 3D glasses are equipped with shutter-type lenses (supporting
multi-device synchronization and unified management through a central control
system). A 150-300-inch curved metal screen is used (suitable for curved
installations in large venues to enhance immersion).
Key optimization points: "Edge Blending" technology is used (to eliminate
seams when splicing multiple projectors, ensuring a continuous 3D image); "Color
Correction" is enabled (to standardize color parameters across multiple
projectors to avoid color shift); and redundant power supplies are used (to
prevent damage from sudden power outages and ensure long-term stable operation).
IV. Optimizing 3D Projection Image Quality and Troubleshooting Common
Problems
(I) Key Measures for Image Quality Optimization
Improving 3D Image Clarity: Adjust the projector's "Sharpness" parameter
(50%-70% is recommended; higher values can cause jagged edges). Ensure the
source resolution matches the projector's native resolution (e.g., when playing
1080p 3D content on a 1080p projector, avoid resolution compression). Clean the
lens and screen (remove dust and stains to reduce image blur).
Enhancing 3D Immersion: Adjust the "3D Depth of Field" (depending on the
content type; set it to medium for movies and high for games to enhance the
sense of three-dimensionality). Optimize the viewing distance (recommended
1.5-2.5 times the screen's diagonal length; viewing too close can cause
dizziness, while viewing too far away can weaken the sense of
three-dimensionality). Control ambient light (for home use, turn off bright
lights; for commercial use, avoid direct sunlight on the screen).
Optimizing Color Reproduction: Adjust the "Color Temperature" parameter
(cool tones are suitable for science fiction content, warm tones are suitable
for humanistic content). Enable the "Color Enhancement" function (for 3D
content). Optimize color saturation for the content and avoid color casts), and
ensure your 3D glasses are not worn out (aging of shutter-type lenses can cause
darker colors, and wear of polarized-type lenses can cause uneven colors).
(II) Common Problems and Solutions
3D Ghosting: If using a DLP projector, check whether the shutter glasses
are synchronized with the projector (re-pair the infrared/Bluetooth signal and
replace the glasses' batteries). Adjust the projector's "3D Sync Delay"
parameter (fine-tune by ±5ms until the ghosting disappears). If using an LCD
projector, check whether the polarizer is offset (recalibrate the polarization
direction) and confirm that the screen is a dedicated polarizing screen (replace
a regular white screen with a polarizing screen).
3D Signal Unrecognition: Check whether the signal source output format is
compatible with the projector (if the projector does not support 4K 3D, reduce
the source resolution to 1080p). Replace the HDMI cable (use HDMI 1.4 or above
to avoid cable damage). Restart the projector and signal source device (clear
the device cache).
Dizziness from wearing 3D glasses: Reduce the 3D depth of field parameter
(reduce the three-dimensional effect of the image), adjust the projector's
refresh rate (increase to 120Hz to reduce screen flicker), and manage viewing
time (take a 5-minute break every 30 minutes). minutes), ensure the image is not
offset (realign the projector and screen to avoid tilting the image);
3D image brightness is insufficient: Clean the projector lens (remove dust
and improve light transmittance), replace the screen with a high-gain screen
(such as a metal screen with a gain ≥ 2.0), enable the projector's "High
Brightness Mode" (sacrifice some contrast to increase brightness), and check
whether the 3D glasses are worn (shutter glasses should be replaced if their
light transmittance decreases).
V. Key Points for 3D Projection System Installation and Maintenance
(I) Installation Specifications5cm to avoid excessive keystone correction
and image quality loss). Use anti-vibration mounts when ceiling mounting (to
reduce image jitter caused by ambient vibration).
Screen Installation: The screen should be slightly above the audience's eye
level (to avoid tilting their heads). Ensure the screen is flat when securing it
(no wrinkles to avoid affecting the smoothness of the 3D image). For polarized
screens, confirm the polarization direction (aligned with the LCD projector's
polarizer, with horizontal/vertical polarization).
Cable Arrangement: Avoid running HDMI cables parallel to power lines (≥30cm
apart to prevent electromagnetic interference). Install wireless transmission
equipment in an unobstructed location to ensure signal coverage. Ensure cable
joints are waterproof (for outdoor projects). (II) Daily Maintenance
Projector Maintenance: Clean the air inlet filter regularly (every 2-3
months to prevent dust from clogging and overheating). Replace the lamp (when
brightness drops by more than 30% or after 6,000 hours of use, follow the
projector manual and avoid touching the glass portion of the lamp). Maintain a
dry storage environment (humidity 40%-60% to prevent lens fogging).
3D Glasses Maintenance: Replace the batteries regularly (every 3-6 months,
depending on frequency of use). Avoid dropping (to prevent lens breakage and
damage to the sync module). Avoid scratching the lenses of polarized glasses
(use a glasses cloth to clean, not rough materials like paper towels).
Screen Maintenance: Vacuum the screen regularly (on low power to avoid
damaging the coating). Avoid spills (if stains are present, wipe gently with a
damp cloth. Avoid using alcohol or other corrosive cleaners on white plastic
screens). Retract the screen when not in use for extended periods to prevent
dust accumulation and deformation.
Projector Installation: Determine the installation distance based on the
throw ratio (e.g., a 100-inch screen for a projector with a throw ratio of 1.2
should be installed at 2.4 meters). Ensure that the center of the lens and the
center of the screen are aligned (with a deviation of no more than 1 meter).
Read recommendations:
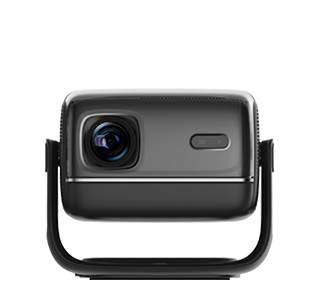
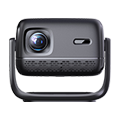
HW45 Home Cinema - HW Series Projector
Projector Speakers with Excellent Sound Quality
Teaching-Specific Projector


 Reviewed: