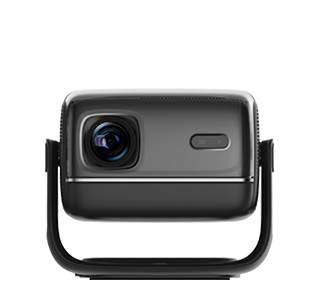
The split-screen display function of laptop connected to projector is widely used in office meetings, classroom teaching and home entertainment scenarios. It can realize independent display of different content on the laptop screen and the projector screen, avoiding the embarrassment of synchronous screen projection and improving work and display efficiency. Many users only master the duplicate screen projection mode, but do not know how to set split-screen extended display. Standardized split-screen setting steps can realize one machine dual-screen independent work, with simple operation and strong practicability, compatible with Windows and Mac laptop systems.
For Windows system laptops, the split-screen extended display setting is highly operable. First, use HDMI or VGA cable to stably connect the laptop and the projector, and turn on the projector to ensure the equipment is normally identified. Then press the shortcut key “Win + P” on the laptop keyboard, and the screen projection mode selection bar will pop up on the right side of the screen, including four modes: PC screen only, duplicate, extend, second screen only. Click the “extend” mode, and the system will automatically identify the projector as the second extended screen, completing the dual-screen split-screen foundation setting. At this time, the laptop screen and the projector screen form two independent display areas, which can display different content respectively.
After enabling the extended mode, users can freely drag and distribute window content to realize split-screen office and entertainment. Drag the opened document, PPT, video and other windows from the laptop screen to the projector extended screen to realize independent display of different content. For example, display the meeting PPT on the projector screen for audience viewing, and display the speaker notes and operation interface on the laptop screen, which is convenient for speakers to operate independently. In addition, users can enter the system display settings to adjust the resolution, brightness and screen sequence of the two screens, set the main and auxiliary screens according to usage habits, and optimize the split-screen display effect to avoid picture blur and mismatch.
For Mac system laptops, the split-screen setting steps are slightly different. After connecting the projector, click the Apple icon in the upper left corner of the desktop, enter “System Settings”, select “Display” options, and find the “arrangement” column. Cancel the “mirror display” option, and the system will automatically enable the extended split-screen mode. Users can drag the screen icon to adjust the relative position of the two screens, and set the main screen and extended screen. After setting, you can drag different application windows to the projector screen at will to realize independent split-screen display. The dual-screen split-screen function gives full play to the large-screen advantage of the projector, greatly improves the efficiency of meeting demonstrations and daily office work, and realizes multi-task parallel processing.
Read recommendations:
HI Gift Customization - HI Series Projector
Replacement of Projector Bulbs
Projector Auto-focus













 Reviewed: